The object editor is the central Editor to import and edit 3D resources.
The abbreviation for the object editor is OE. It is also referenced as a shape editor.
Objects are named as shapes.
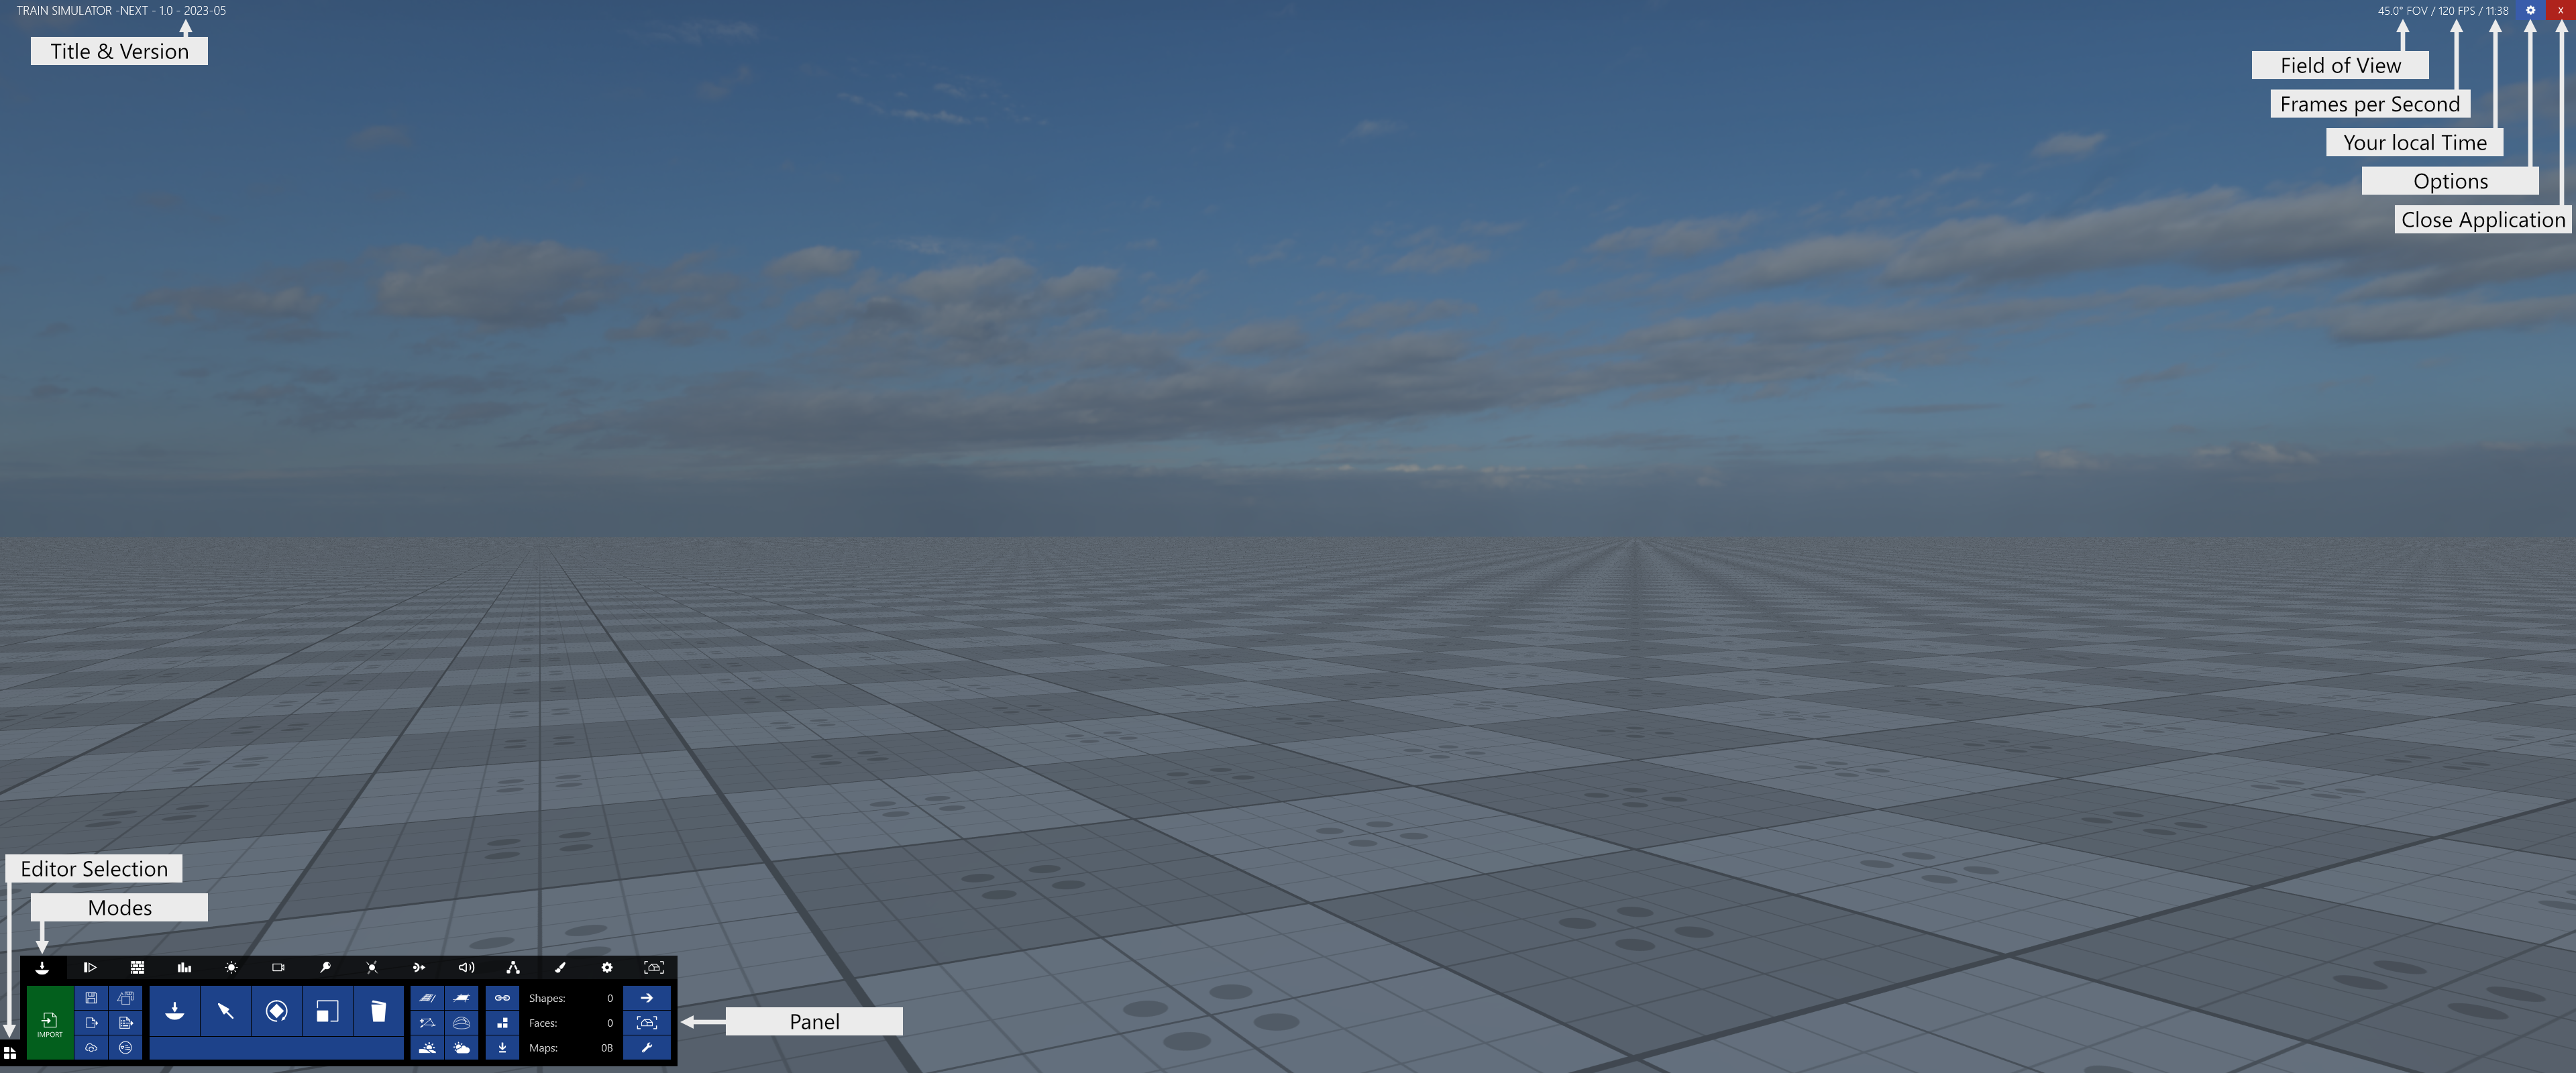
Each mode has its panel. So if you work with a mode, it has its mode panel.
The object editor provides these modes:
| Symbol | Mode panel | What to do here |
|---|---|---|
 |
Anchor panel | Anchors describe specific points for a shape, i. e., for wire connections. You can assign, change and remove anchors for the object in this Mode. |
 |
Animation panel |
Control, review (and set) animation layers for shapes. This Mode will be reviewed and changed in one or two weeks. There is no change to the internal data: so you can use the tool as given. |
 |
Base panel (Start) | The base panel is the central place to import resources, to change the scene and to set basic properties for your scene and shape. |
 |
Camera panel | Assign, change and remove cameras of your shape. |
 |
Environment panel | Change the appearance of your scene in this panel. |
 |
Lens flare panel | Set the binding information for lens flares. |
 |
Light panel | Assign, change and remove lights of your shape. |
 |
Material panel | Change how materials appear on your shape. |
 |
Node panel | Select Nodes of your shape and change its properties. |
 |
Performance panel | Review the performance data for your shape. |
 |
Rendering panel | Set advanced rendering settings and apply a high-quality mode for screenshots. |
 |
Repaint panel | Enable the repaint mode for a shape. |
 |
Script panel | Assign, change, remove and test scripts in this panel. |
 |
Sound panel | Assign, change and remove sounds in this panel. |
These keys can be used in the object editor to control the player camera:
| Keyboard | Action |
|---|---|
| W or ↑ | Move the player camera forward. |
| A or ← | Move the player camera left. |
| S or ↓ | Move the player camera backward. |
| D or → | Move the player camera right. |
| E | Move the player camera up. |
| Q | Move the player camera down. |
| Shift + W or shift + ↑ | Move the player camera forward fast. The speed depends on the height above the ground. |
| Shift + A or shift + ← | Move the player camera left fast. The speed depends on the height above the ground. |
| Shift + S or shift + ↓ | Move the player camera backward fast. The speed depends on the height above the ground. |
| Shift + D or shift + → | Move the player camera right fast. The speed depends on the height above the ground. |
| Shift + E | Move the player camera up fast. |
| Shift + Q | Move the player camera down fast. |
| Ctrl + Q | Roll the camera clock-wise. Stop the rotation with ctrl + W. |
| Ctrl + E | Roll the camera counter-clock-wise. Stop the rotation with ctrl + W. |
| Ctrl + W | Stop the camera roll. |
| Ctrl + S | Reset the camera roll. |
| Ctrl + A | Set next horizontal view direction. E.g., useful for cab cameras. |
| Ctrl + E | Set prior horizontal view direction. E.g., useful for cab cameras. |
Interact with your mouse with the object editor in this way to change the player camera:
| Mouse | Action |
|---|---|
| Press right + move on x-axis | Rotate the player camera horizontally. If not inverted, move right to rotate the camera towards to the right ("push"). The cursor is fixed during rotation. |
| Press right + move on y-axis | Rotate the player camera vertically. If not inverted, move up to rotate the camera down ("pull"). The cursor is fixed during rotation. |
| Rotate middle mouse button | Zooms the camera in (forward) and out (backward). The applied field of view can be read on the title bar, right side. |
These keys can be used in the object editor to control the behavior of the application and mode:
| Keyboard | Action |
|---|---|
| Escape | Opens the window to leave the application. |
| F1 | Show this help page for the base panel. |
| Shift + F1 | Hide or show the user interface. |
| F2 | Save the current selected shape. |
| F3 | Recenter the tracker. |
| Shift + F3 | Reload the resources (Textures etc.). |
| F4 | Open the editor home (Route Selection). |
| F5 | Open the object editor. |
| F6 | Open the land data editor. |
| F7 | Open the route editor. |
| F8 | Open the network editor. |
| F9 | Open the event editor. |
| F10 | Open the activity editor. |
| F11 | Show the options window. |
| Scroll (Rollen) |
Change the information in the title bar text. Roll 1: Field of view in degree / Frames per second / Your system time |
| Ctrl + C | Copy the full text of the text box control, if any is active. |
| Ctrl + X | Cut the full text of the text box control, if any is active. |
| Ctrl + V | Paste the full text into the text box control, if any is active. |
For people who are new to 3D modelling, we recommend these steps:
For people who switch to Train Simulator NEXT for example from Dovetail Games Train Simulator Classic, we recommend these steps: